Download file from codecanyon and extract in your pc and you will get 2 folder. Listed below:
- Documentation
- WhatSender
Step 1:
Download file from codecanyon and extract in your pc and you will get 02 folder. Listed below:
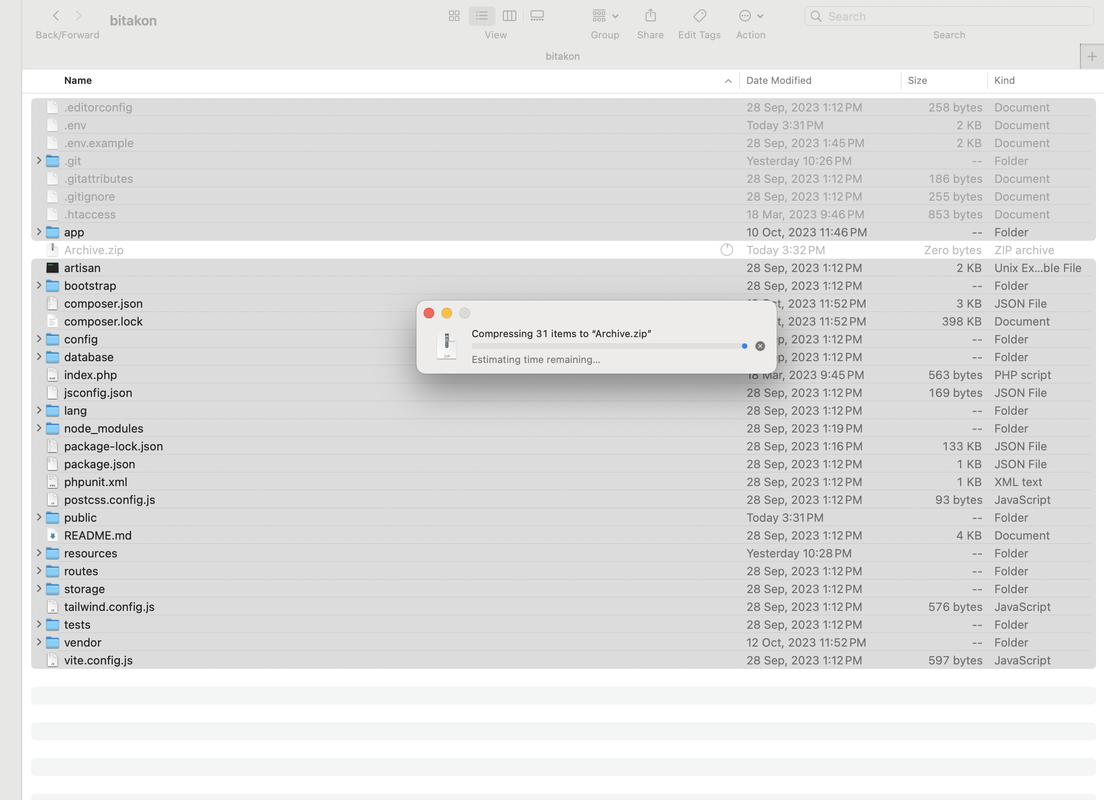
Open the WhatSender folder, and make zip all files. you have to upload it to your domain root (server) using ftp or file manager.

Step 2:
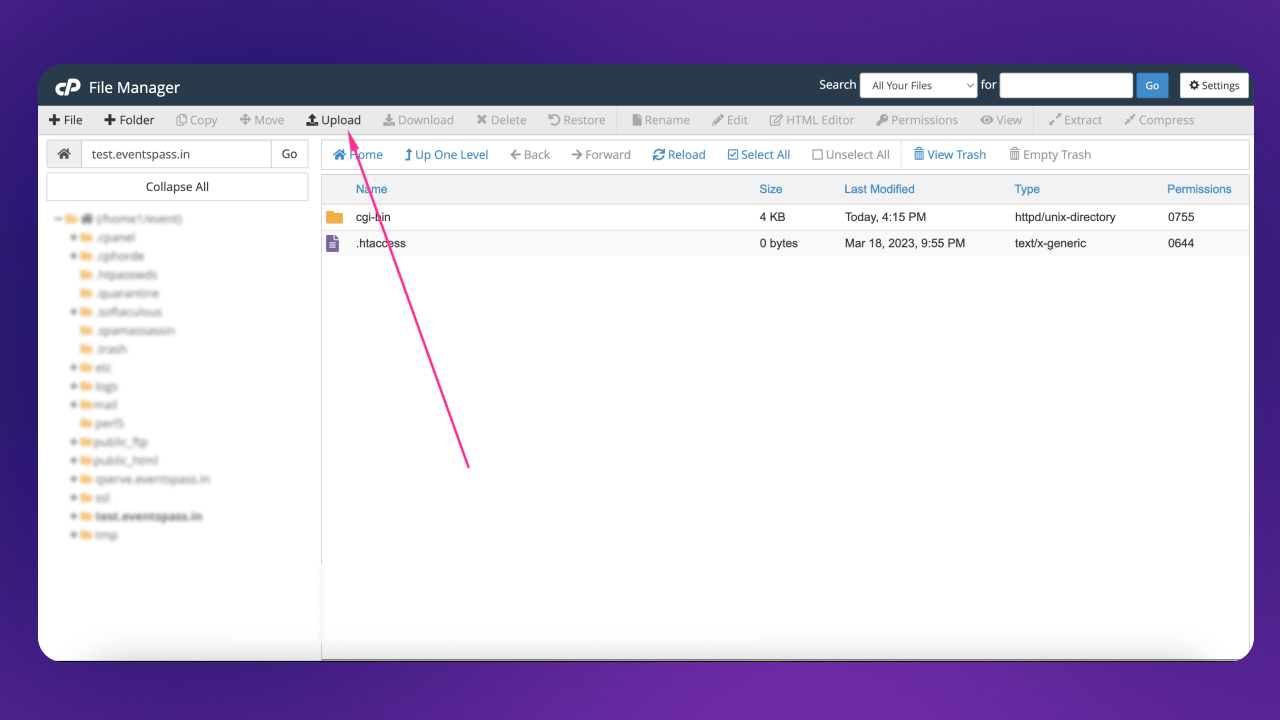
Now login to you control panel and Upload zip file to server:
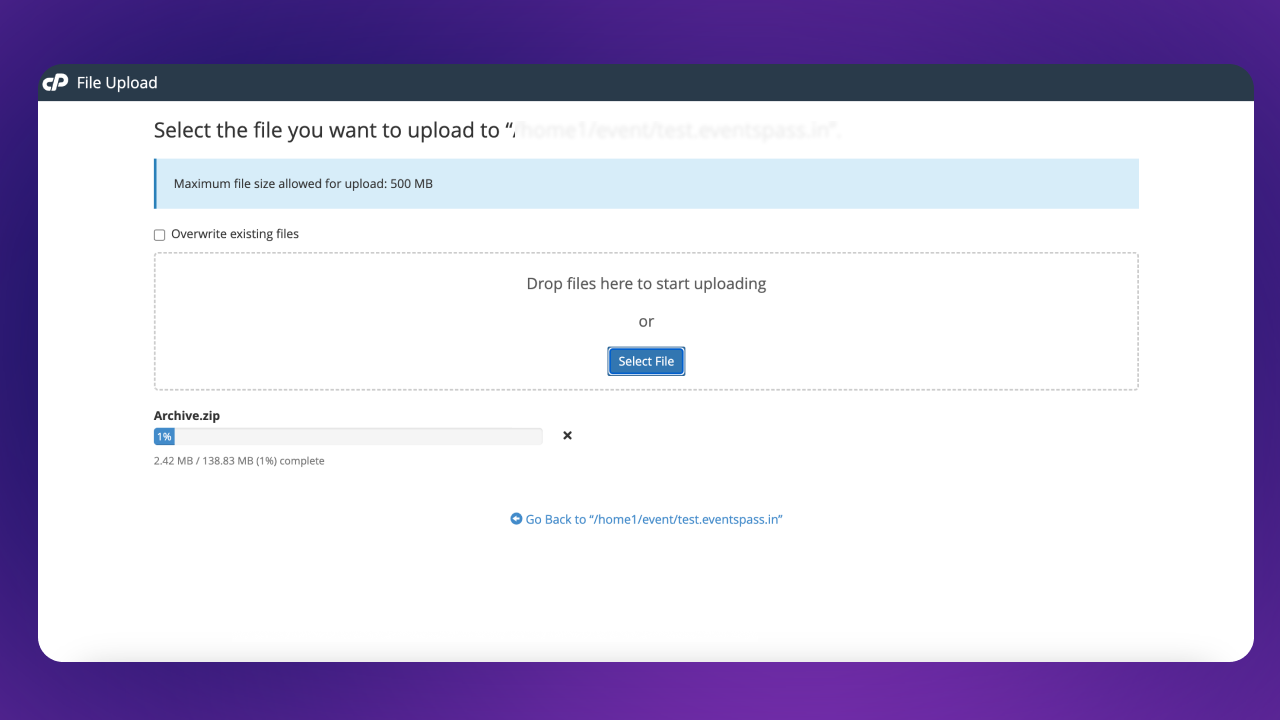
Click the Select File button and select the zip file

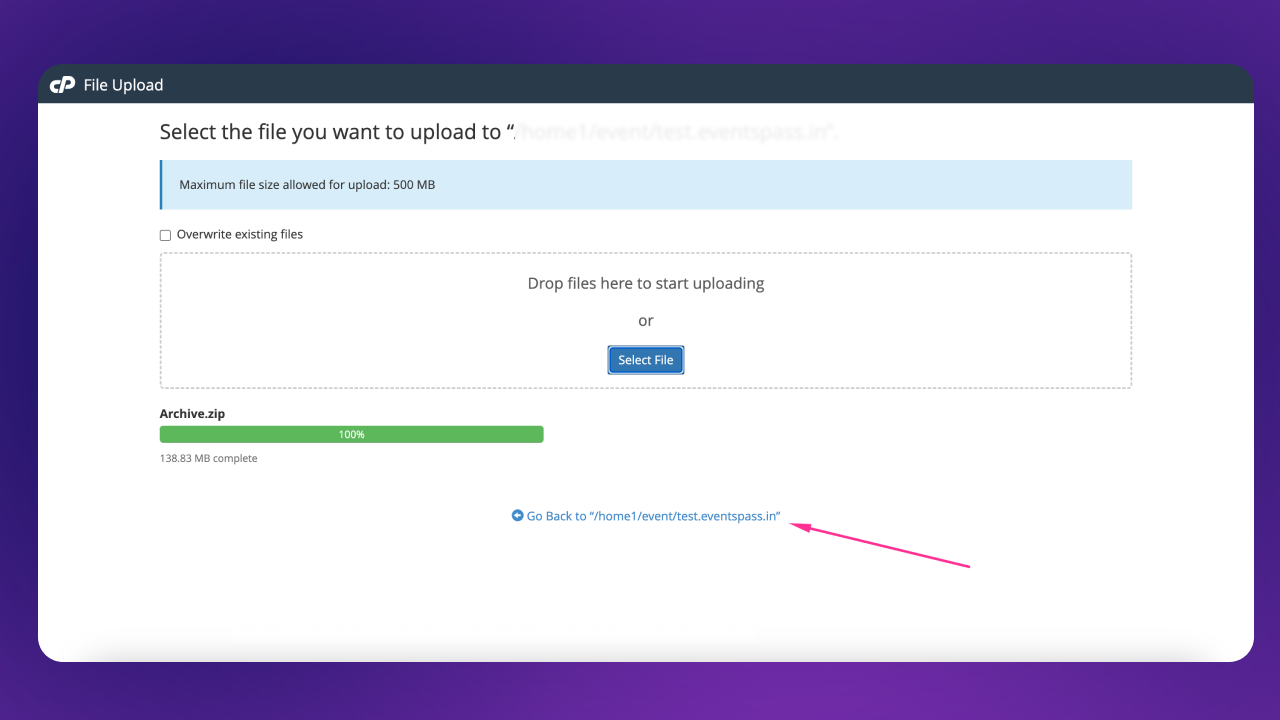
After 100% complete the uploading process click to Go Back link
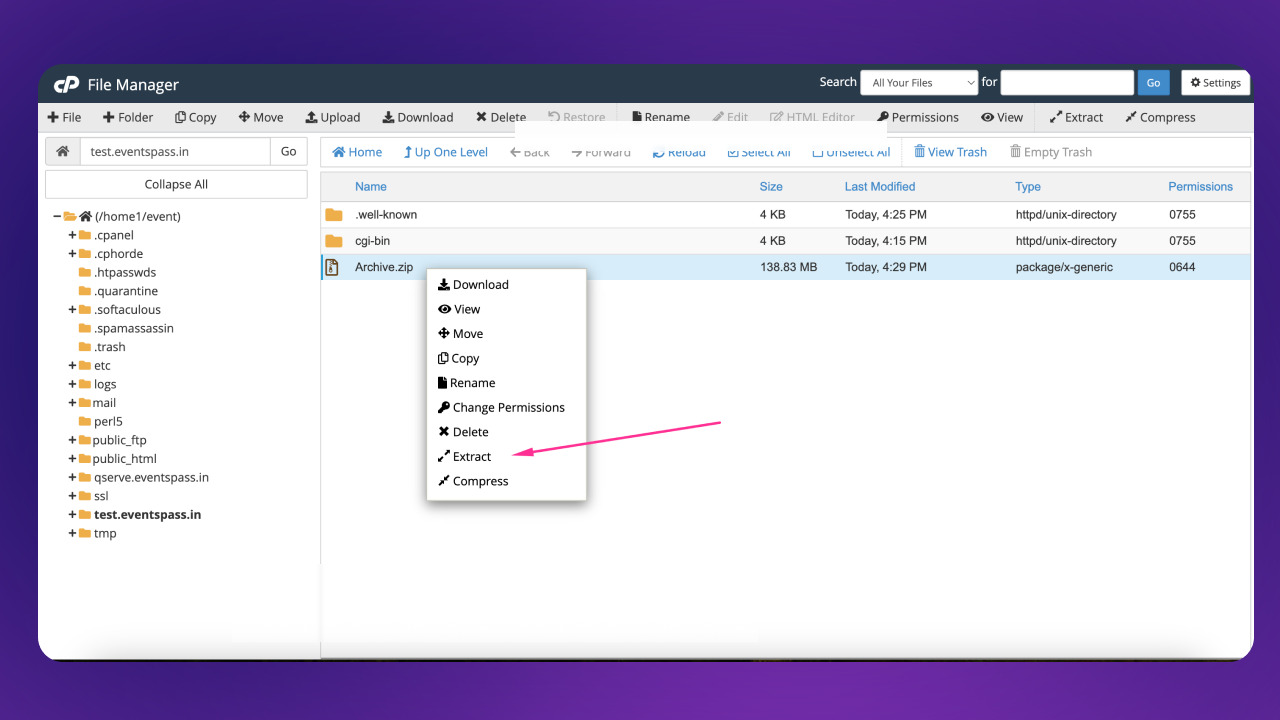
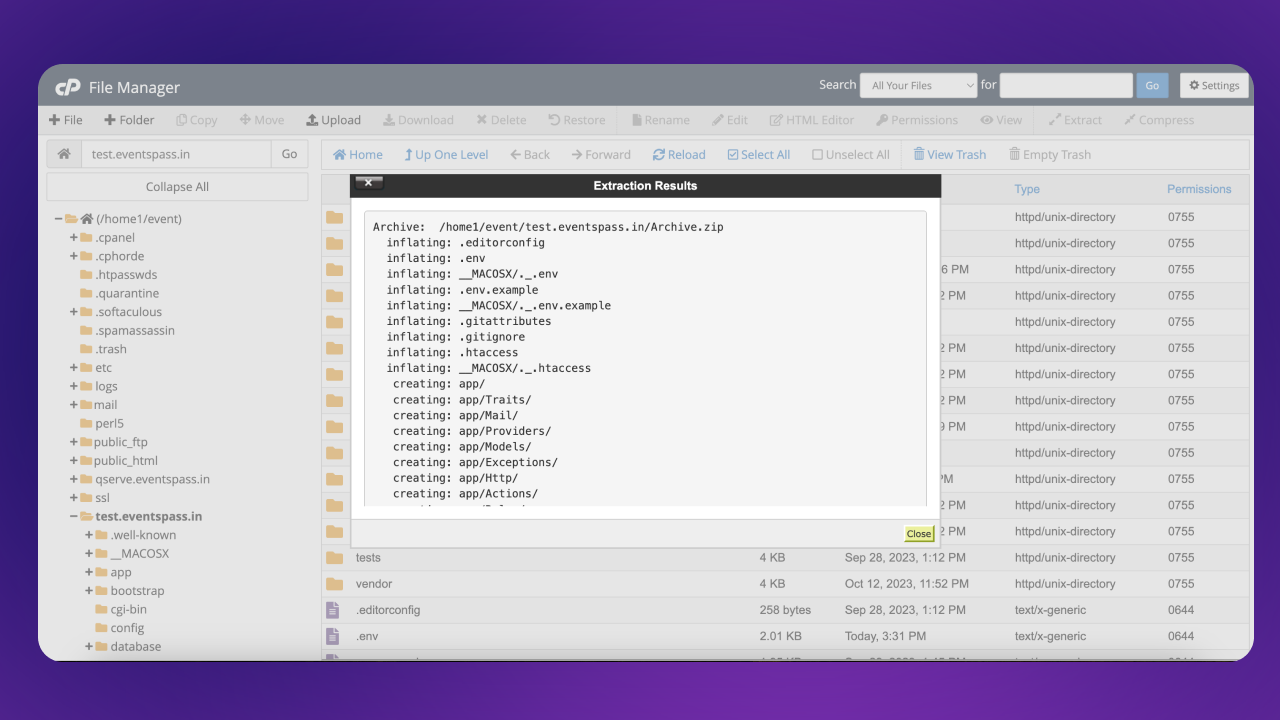
Select the uploaded zip file and click Extract option
Step 3:
domain-root/public)
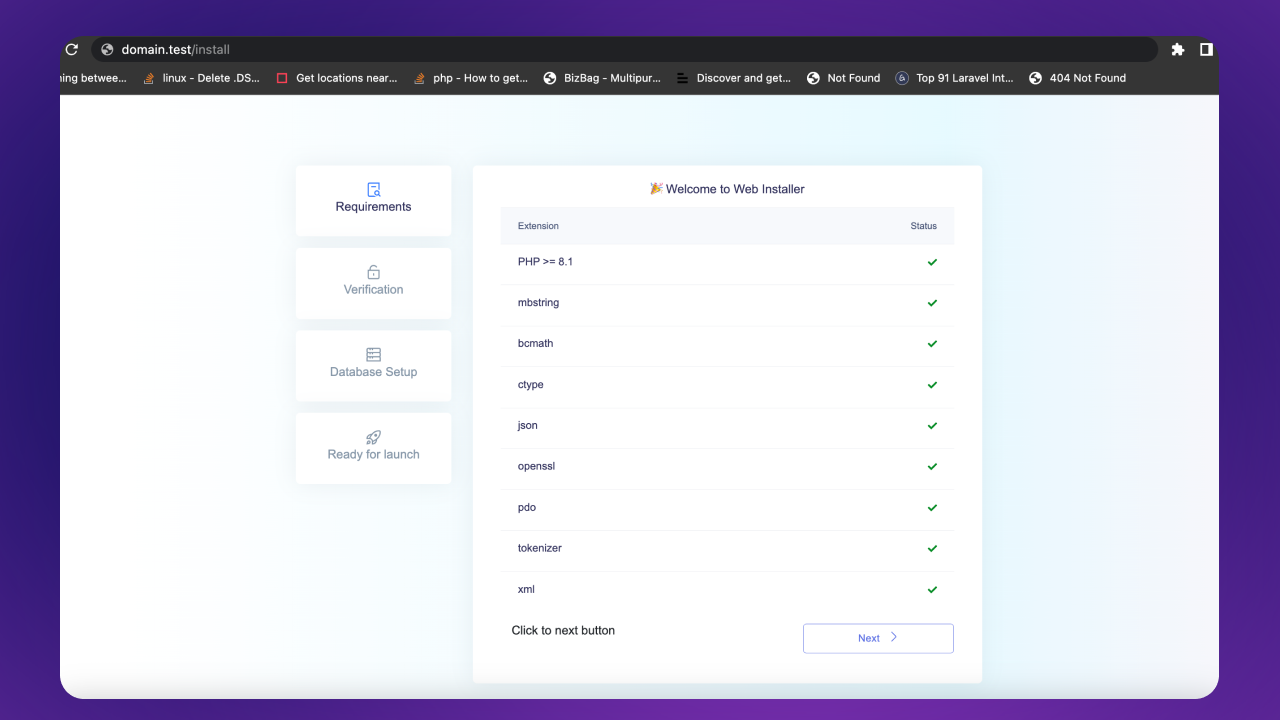
Go to your domain.com/install
Please full fill all requirements from your server and click next button. For folder permissions you can run the following command:
chmod -R 775 /webroot/.env
chmod -R 775 /webroot/storage
chmod -R 775 /webroot/bootstrap/cache
chmod -R 775 /webroot/public/uploads
Click to next button if all required extensions are enabled
Step 4:
Enter your purchase key.
https://help.market.envato.com/hc/en-us/articles/202822600-Where-Is-My-Purchase-Code-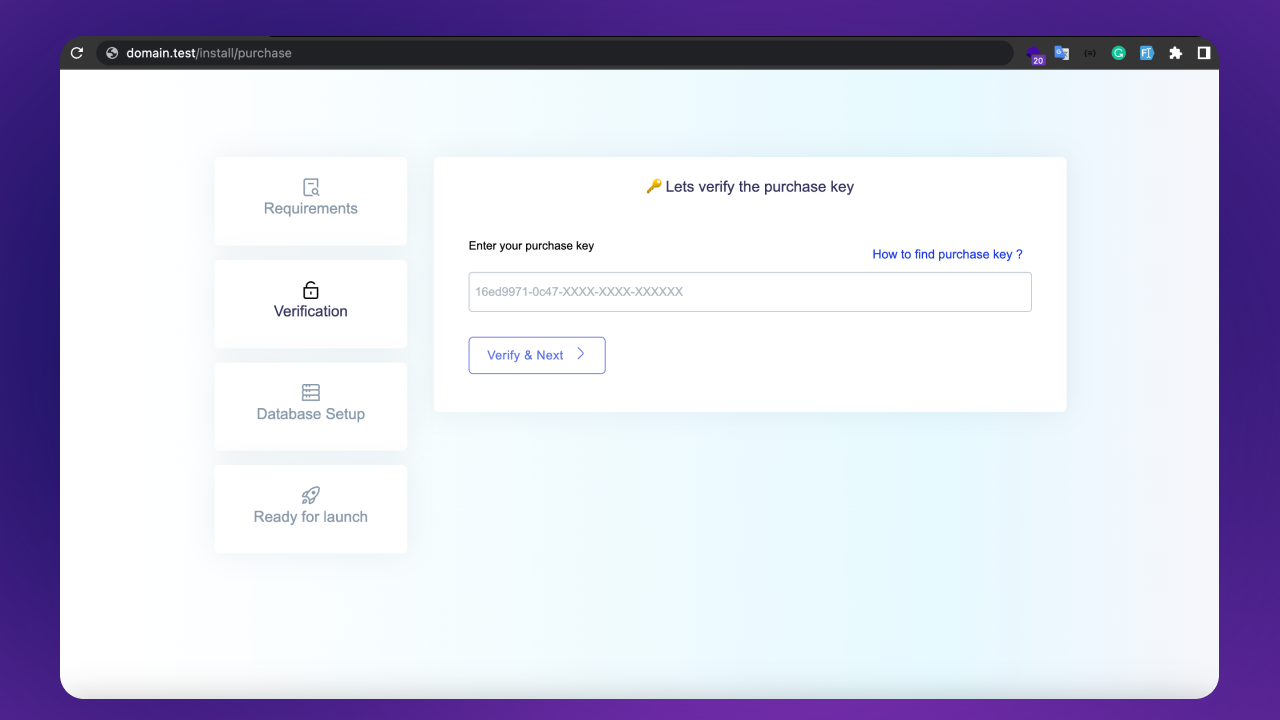
Create database:
Go to CPanel to MySQL® Database Wizard
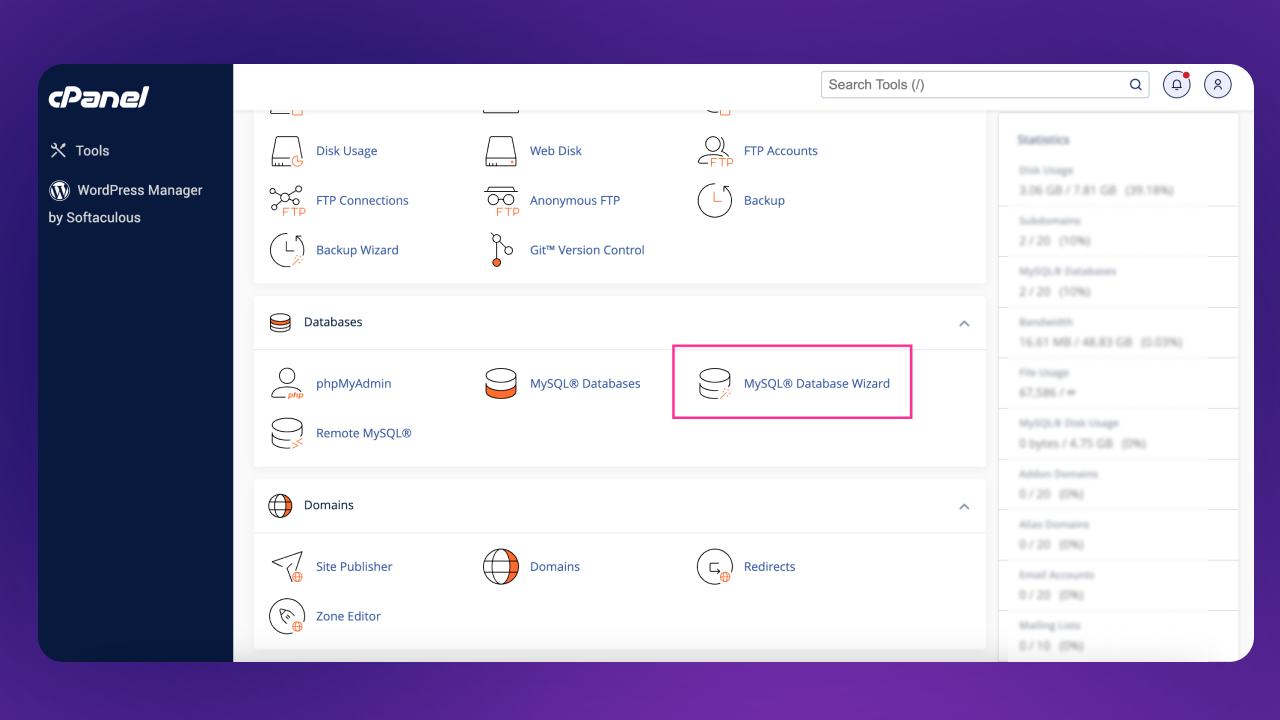
01. Create database
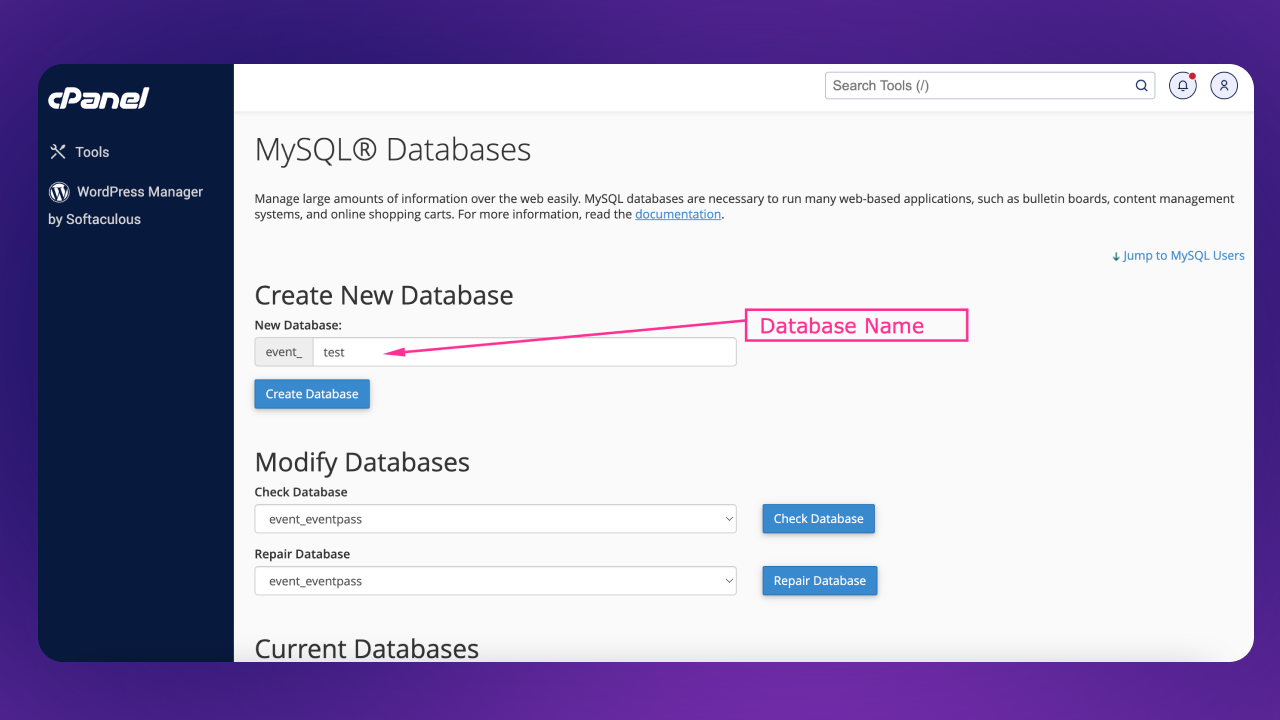
02.Create Database Users with password
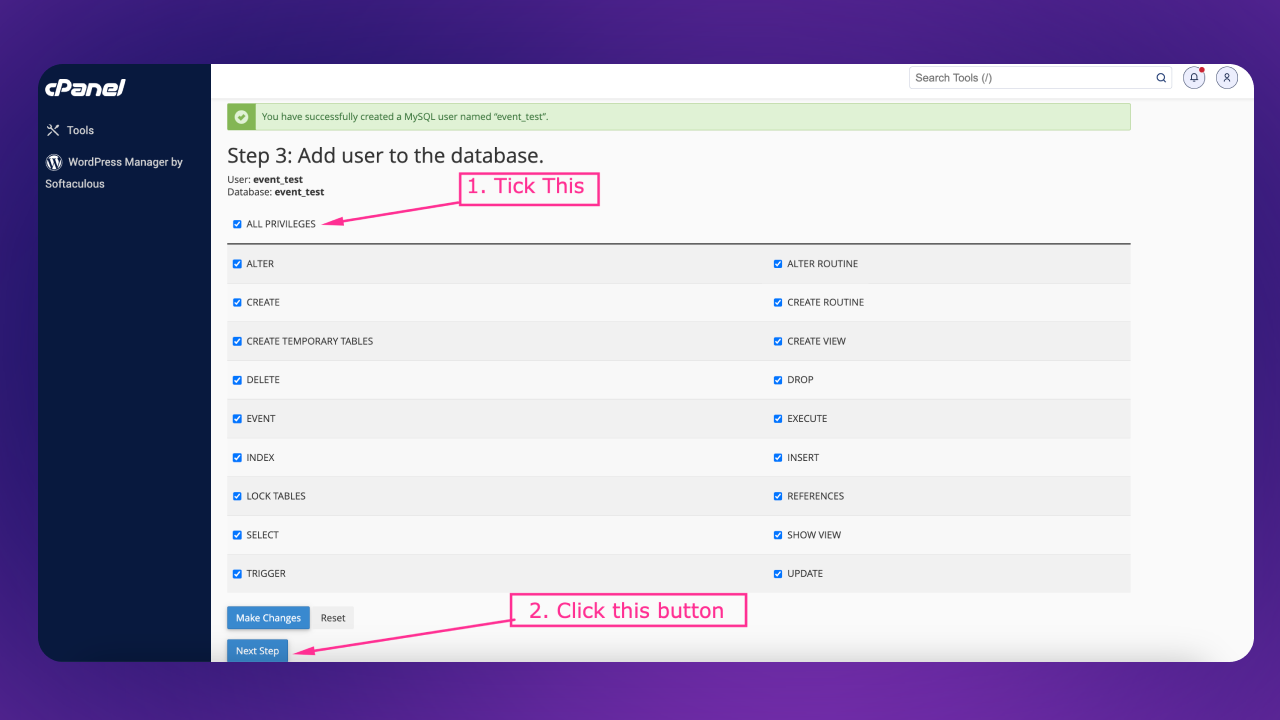
 Copy the credintials and paste it somewhere Click to Create User button
03. Add user to the database. check all privileges and click make changes. and click the Next Step button
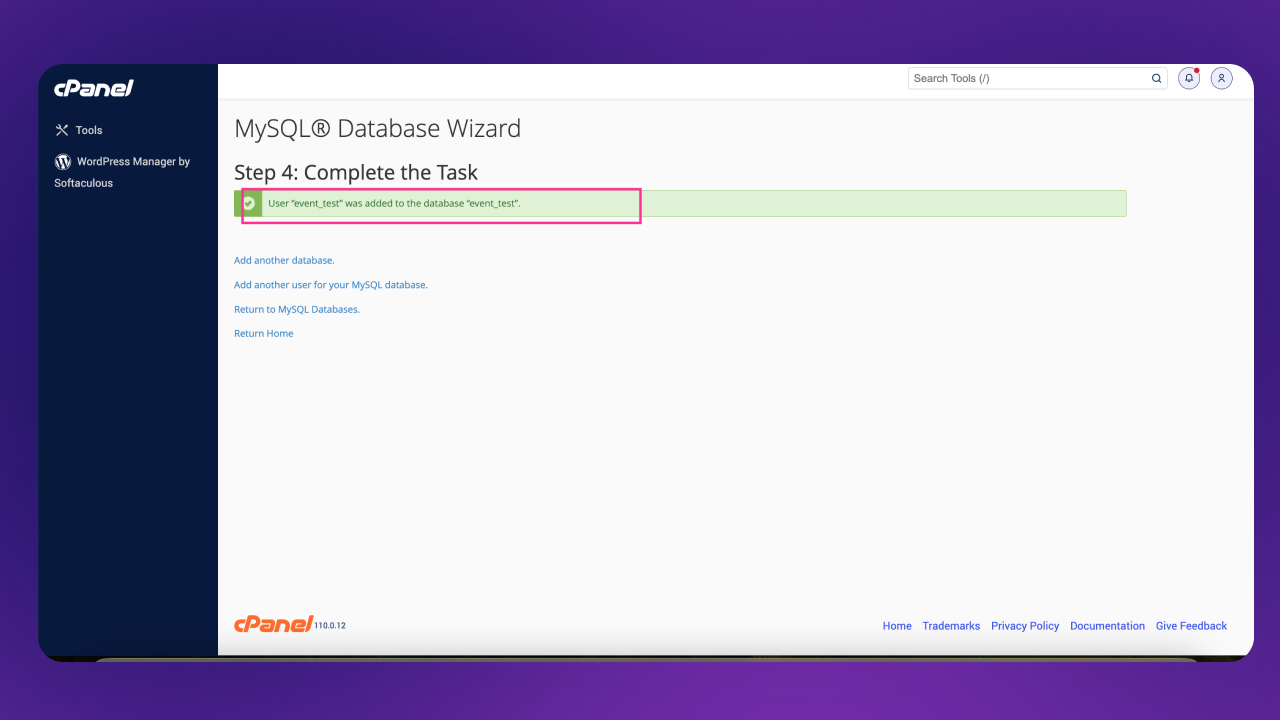
04. Database create complete
Step 5:
Enter your site name and enter database credentials.
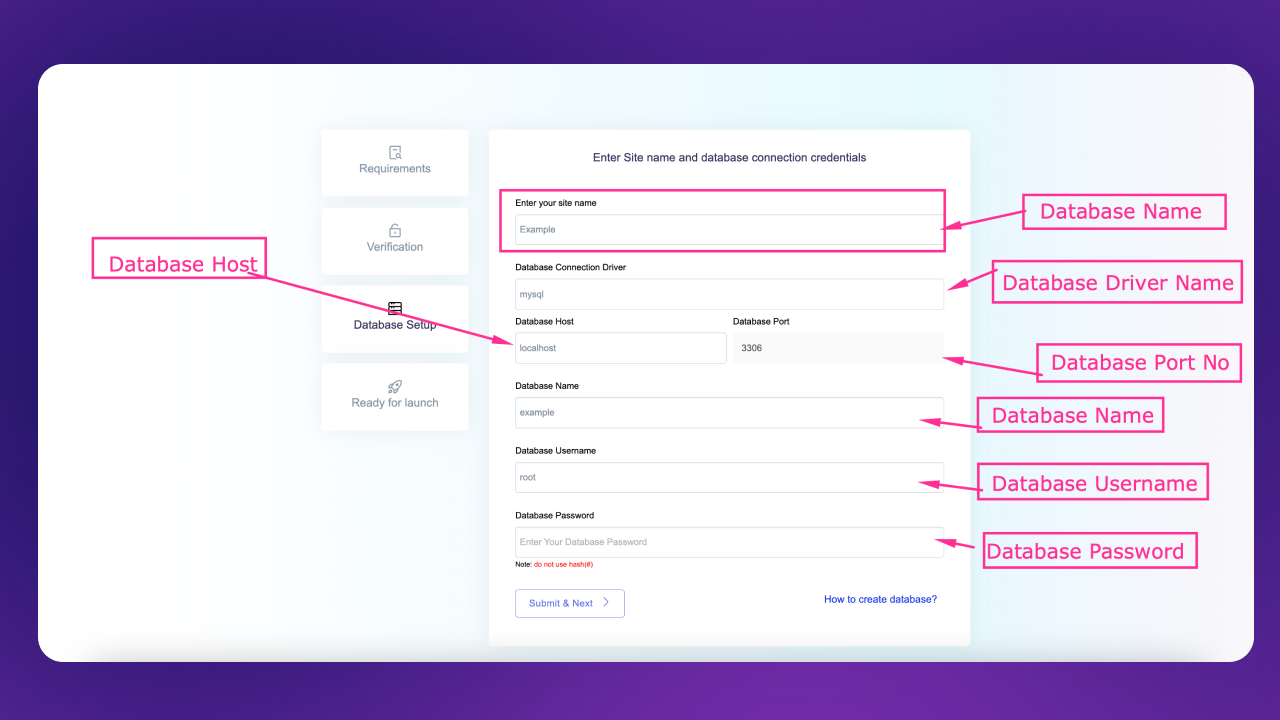
After fillup the form click to submit & next button.
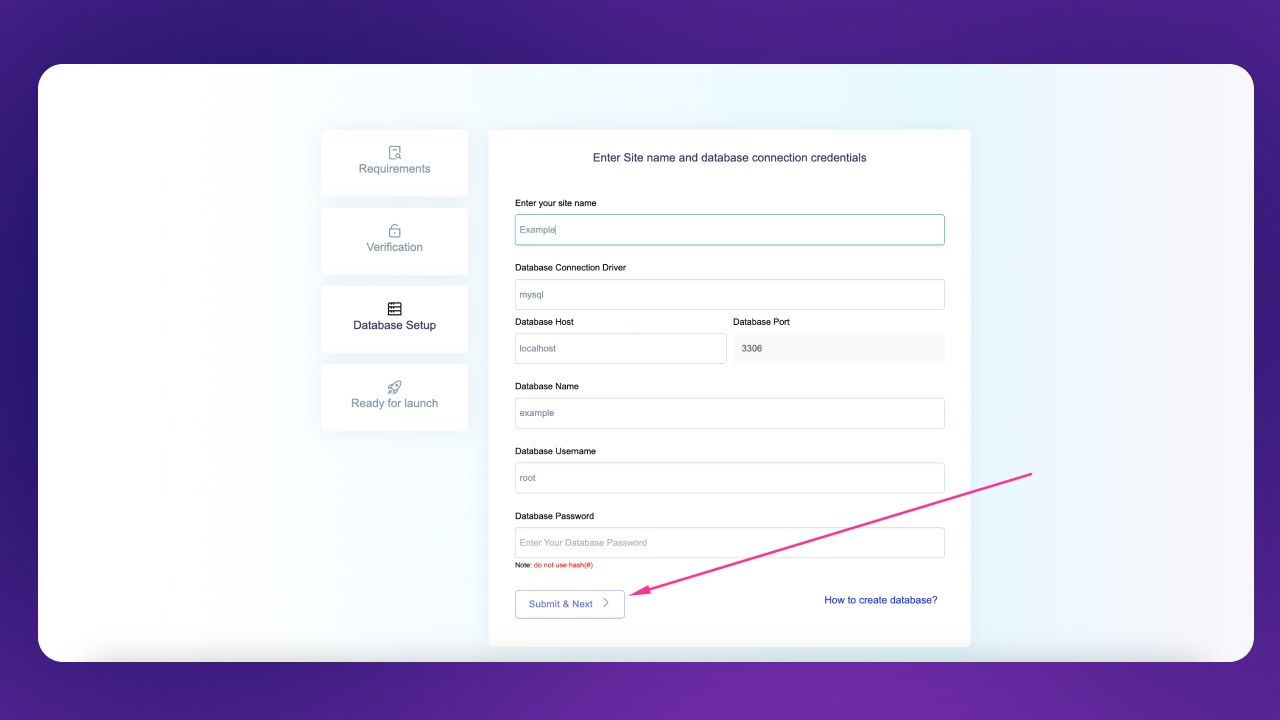
it will take sometimes based on your server speed perfomace. And it will automatically redirect to installlation complete page

Admin Panel Credentials
Admin Panel:
https:your-domain.com/login
Email: admin@admin.com
Password: password